
[Episode one is here, episode two is here]
Episode 3 – less is more!
After tinkering a while with my wannabe web radio player, I decided that the next step will include:
- getting a better audio output: the Raspberry native audio is ‘suboptimal’ and far from what I need;
- replacing some (or all) the buttons: they’re good for an initial Proof Of Concept, but I’d like something more ‘natural’ to use;
- add an LCD display to visualize the radio station I’m listening to;
- reorganizing the cables getting out of the breadboard.
Moreover, on the software side, I switched from the Mopidy based PiMusicBox to a combination of a bare MPD server managed through a command line client (mpc): I don’t need all the features offered by Mopidy and, besides that, I found MPD much more responsive while playing radio streams. I’m going to add details on the software side in the next posts….
A better audio
The Rasberry embedded audio subsystem works but it’s very minimal in terms of sound quality (and I’m not an audiophile). Different options exist on the market, ranging from very cheap USB DACs to high end dedicated hardware. A popular choice are the HiFiBerry boards (and clones), since they’re very good and reasonably priced. Unfortunately, the one I’ve chosen apparently went out of production (or so my local reseller told me) with no replacement plan, so I ended up ordering a PiFi DAC+ on Amazon, which is substantially a clone that uses the same HiFiBerry drivers already available for Raspbian.
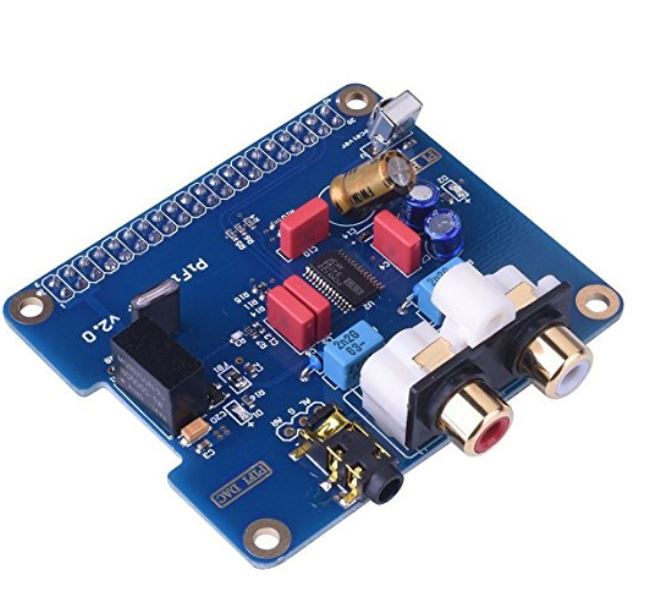
It has one 3.5 mm phone jack and one (gold plated) RCA output, more than enough for my needs. The board comes as a HAT so can be attached directly on the 40 pins of The Raspberry and, thanks to the dedicated DT overlay already present in the Raspbian Stretch distro, it works with minimal configuration effort (for details about the Device Tree architecture included in the Linux kernel here there is a very detailed explanation): all I had to do is to enable the overlay adding a specific line on /boot/config.txt, as explained here and in several other docs:
dtoverlay=hifiberry-dacplus
That’s it: if your board is placed on top of the PI pins (as it is meant to be), it should work (assuming to keep the configuration of alsa that comes with Raspbian, but here things become complex very quickly).
My case was a bit different: I had some additional hardware to be connected to the GPIO pins, so I’d like to wire the very minimal connections to drive the board, leaving all the other pins free for other uses. Searching on the Internet I found out that the HifiBerry needs:
- I2C for configuration: GPIO 2 and 3;
- I2S as sound interface: GPIO 18-21
- power: 5V and ground
I wired them and, to my surprise, it worked!
This is the output of aplay -l :
**** List of PLAYBACK Hardware Devices ****
card 0: sndrpihifiberry [snd_rpi_hifiberry_dacplus], device 0: HiFiBerry DAC+ HiFi pcm512x-hifi-0 []
Subdevices: 1/1
Subdevice #0: subdevice #0
No more buttons (mostly)
I’ve seen a lot of media player boxes over the net full of button-enabled features, but, honestly, I don’t like them: I feel much more’natural’ to turn a knob to adjust volume instead of pushing a ‘+’ or ‘-‘ repeatedly (my opinion, of course). I’d also like to keep a very minimalistic approach on my physical user interface: the lesser, the better.
I did some experiments with different things and the one I like more is based on one single rotary encoder like this (includes a switch that can be activated pressing the knob):
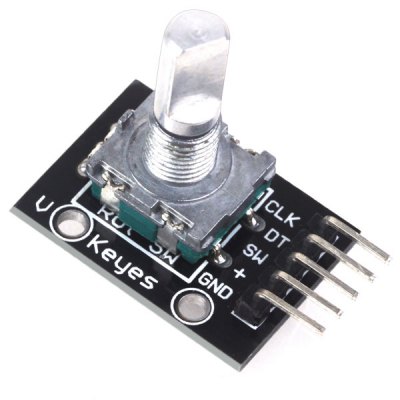
It requires three GPIO pins (two for rotations, one for the switch) and connections to +3.3V and ground. I wired it to the PI to control both radio stream selection and volume level: default control is on volume, stream selection is enabled by pushing the switch. After 30 seconds of inactivity it falls back to volume again (as said, I’m going to add some details on software soon… :-)). No more buttons!
See what I listen to
Here I’m still in the middle of selecting the right piece of hardware. Currently I’m using a very standard LCD display (16 chars, 2 columns) based on the HD44780 chip:
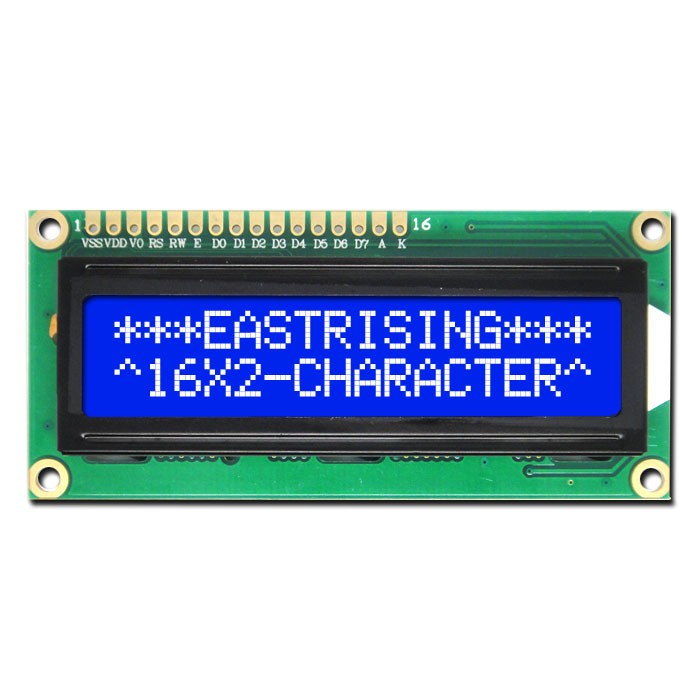
AdaFruit has developed an easy to use python library to control it. There’s also a nice tutorial on how to wire it to the board. The only (big) drawback is the relatively huge number of pins needed to make it work.
A good alternative would be a serial (I2C) version of the same: I have one of those sitting on my desk, but I still need to figure out how to add it to the I2C bus. And the current display, besides the pin usage, works perfectly, so I’m missing some ‘motivational boost’… 🙂
EDIT: I did it. Using the code from this guy (partially adapted) it works like a charm and allowed me to save a lot of pins and jumper wires: it requires only 2 pins for I/O plus voltage and ground.
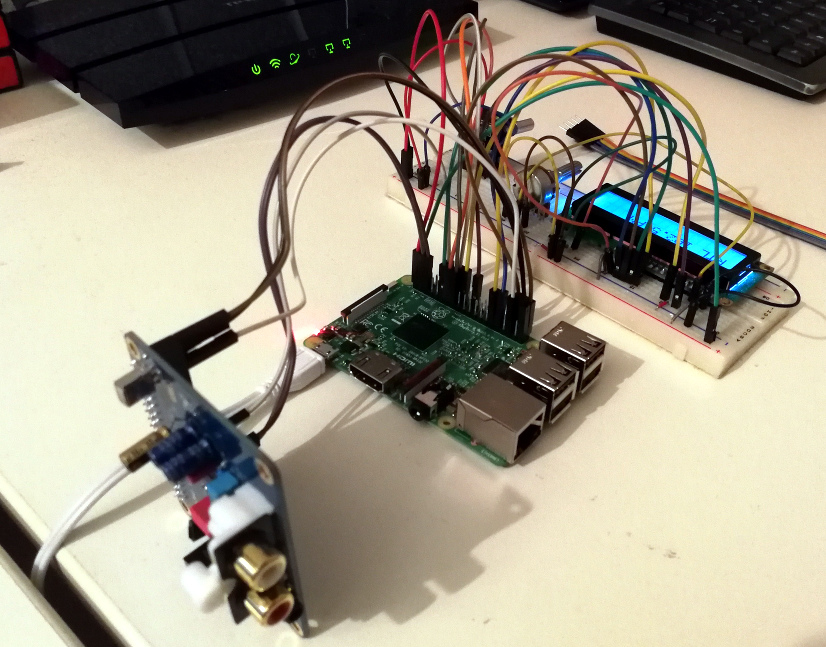
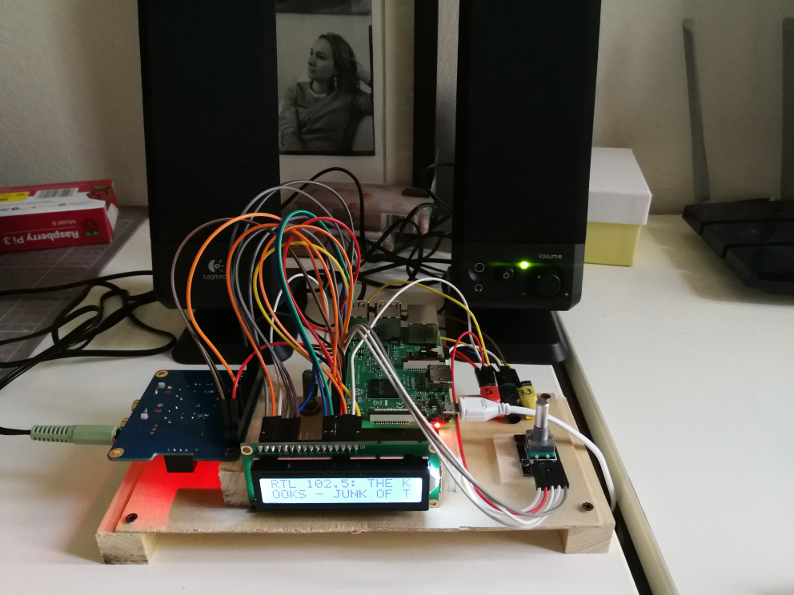
Forget the breadboard!
Not much to say here 🙂
This is where I currently am…no more breadboard, but it is sufficiently clear that I still have to build a proper case:
…and a short video showing it working!
Now it’s time for a brief interlude on how to use a switch (Episode 4).

