
Episode 1 – where it all started
I have an old Tivoli Model One radio in my small kitchen. Cool design, great sound, but after years of good and loyal service it has developed a serious issue: tuning has become very unstable and searching for a specific radio station is now a nightmare. Sometimes touching the central knob is enough to lose the right frequency.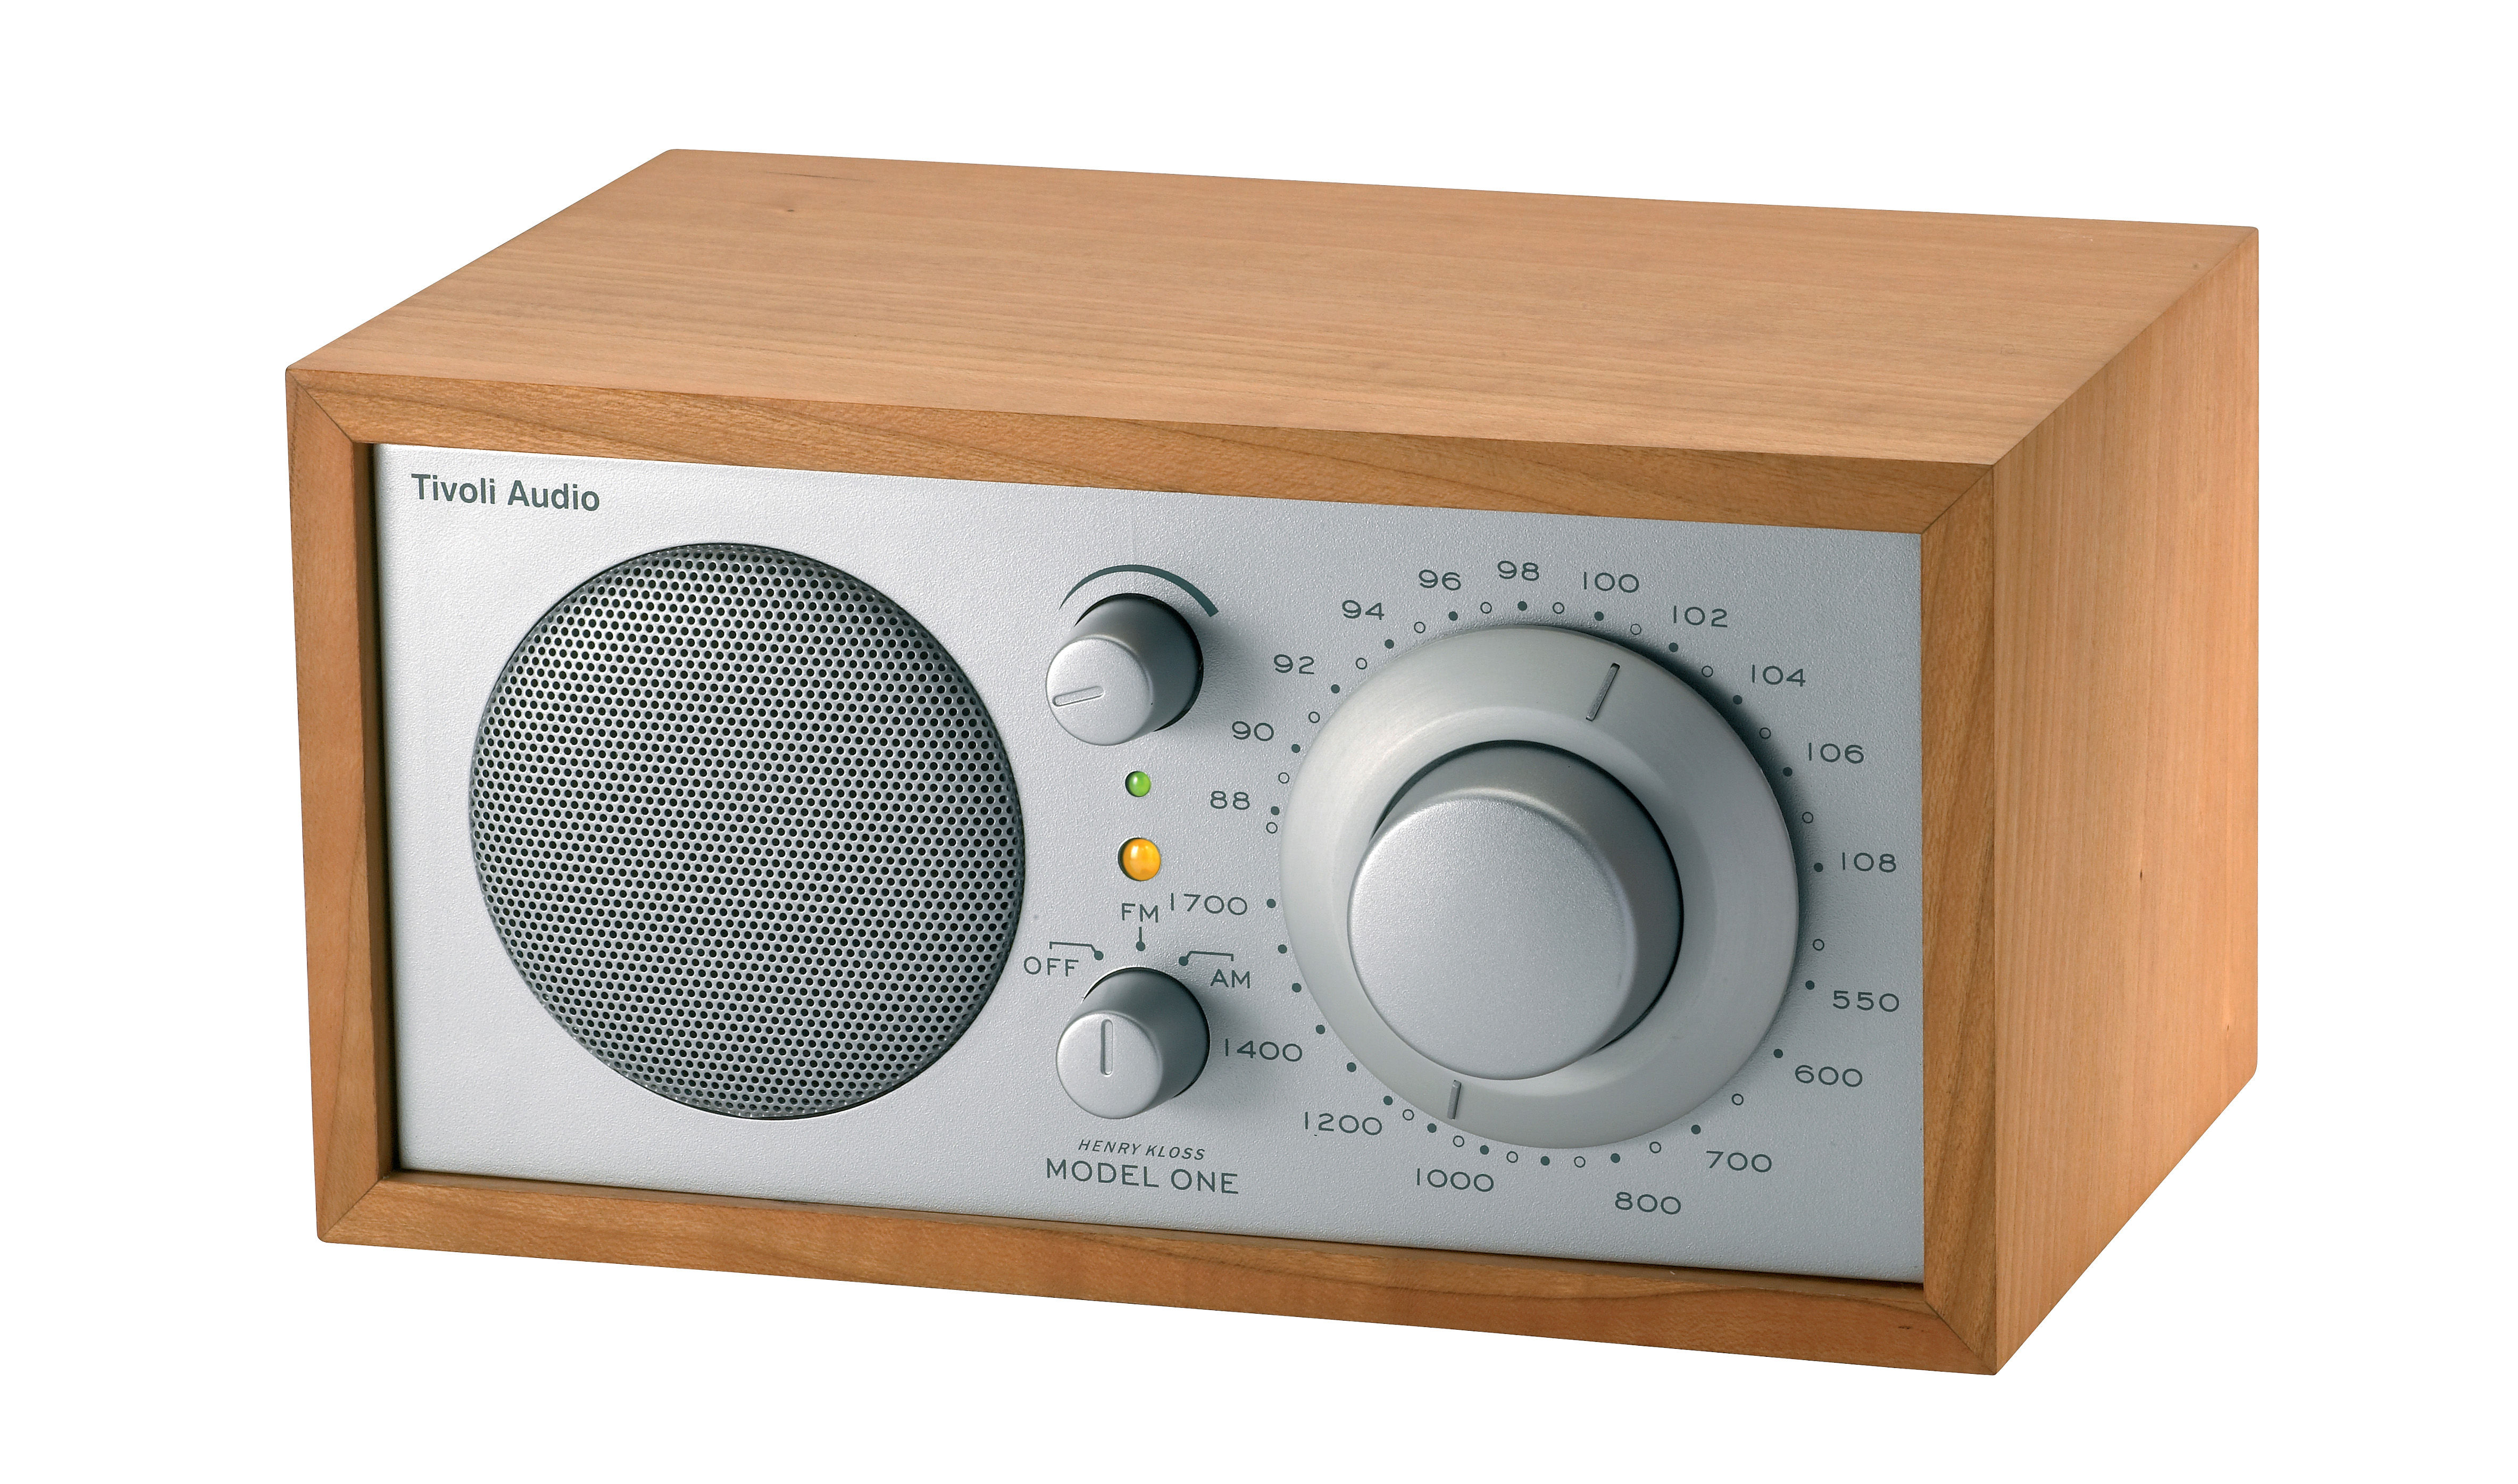
After some googling I figured out that most probably the offender is a variable capacity condenser clogged by dust, which unfortunately is not easy to clean…the most natural choice would have been to replace the whole Tivoli with something else, today the gadget market is full of super-duper ultra-connected radio boxes.
However, being the kind of nerd I actually am and having recently started to play with the Raspberry PI board, I took a different path: my idea was to build a device able to play radio and music streams from the Web (my home network speed has been upgraded to 1 Gb/s, it’s time to take some advantage of it!), to be operable both remotely from my smartphone and locally using buttons and knobs like a ‘real’ radio and, last but not least, to provide some decent audio quality.
I found out that I can accomplish my target by putting together some hardware, some already packaged software and a bit of Python ‘glue code’ to bind all the things. My initial shopping list includes:
- A Raspberry PI 3 board with a 16GB SD card and proper power supply;
- Some basic electronic components like tactile switches, resistors, capacitors, jumper wires, ….
- a low-cost pc speaker (for testing purposes, a simple headset will do).
This is enough to start tinkering. Additional components will involve a better soundcard (like the HiFiBerry) and some quality loudspeakers. And probably an LCD display and something to build a nice case, but all of this will be part of episode 2 (or 3 or whatever).
On the software side, I’ve chosen PiMusicBox, a nice Raspbian-based image (specifically Wheezy with drivers from Jessie) built by this guy that includes Mopidy and some other useful add-ons. As the author says, it can ” stream music from Spotify, SoundCloud, Google Music, Podcasts (with iTunes, gPodder directories), local and networked music files (MP3/OGG/FLAC/AAC), Webradio (with TuneIn, Dirble, AudioAddict, Soma FM directories), Subsonic”…should be enough, I think!
The latest PiMusicBox image can be downloaded from GitHub here. Flashing it on the SD card is pretty straightforward using Etcher and following the general instruction on the Raspberry PI site. Configuring it in a complete headless mode (without attaching a keyboard and a screen) through a WiFi connection required me a bit more of work. First, while the SD card is still connected to your PC you have to open the ‘settings.ini’ file on the card and provide at least:
- your WiFi network SSID and password;
- a name for the Raspberry PI;
- a password for the root account.
If you want to connect to your MusicBox using SSH be sure to enable it by setting enable-ssh = true.
Once you’re done, put the SD card into the Raspberry PI board and power it up. Unfortunately, there’s no evidence that the board can connect to the network or that something didn’t work as expected. The quickest way to check and to get the related IP address is to look for it in the config menu of your WiFi router: more or less all of them provide a way to see the IP of the connected clients. If all worked correctly you should be able to see your MusicBox address: now you can use SSH or one of the available web interfaces to start playing with it:
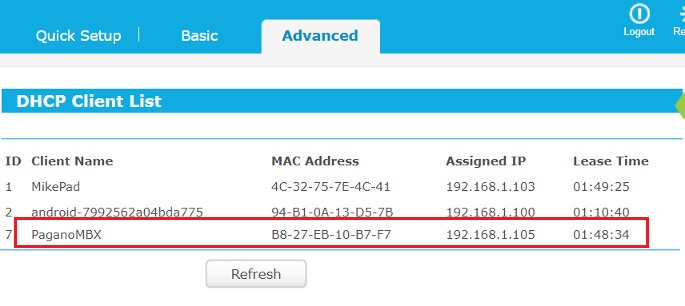
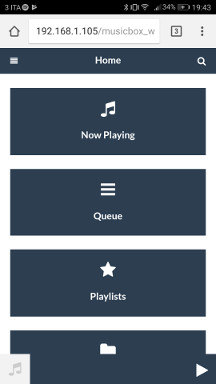
My ‘PaganoMBX’ is up and running! And it has a web interface accessible by any device, here how it looks on my smartphone:
The basic configuration works out of the box, with just one caveat regarding the audio output: on the board there are one connector for a 3,5 mm jack (‘Analog’ output), another one for an HDMI cable, or, if you want, you can use one of the available USB ports. As far as I understand, default output is through the Analog but in my case it didn’t work, I had to manually set the audio output to ‘Analog’ in the (very rich) settings menu. By the way, the native sound quality is rather poor, in the future I will add a better soundcard: PiMusicBox supports boards from HiFiBerry, IQ Audio, JustBoom, Allo and others (needs to be explicitly set into the audio config).
So far so good. Anyway, my initial target was to replace a radio, so I disabled all the other music sources (except Spotify, but this is a long story…) and just added the web stream URLs of the radio station I wanted to listen to.
There are two ways to do it: using the web interface or creating manually a specific entry into a playlist…and here I needed to dig a bit into the PiMusicBox files since at first I wasn’t able to find what I was looking for.
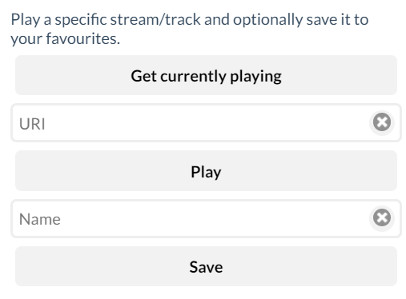
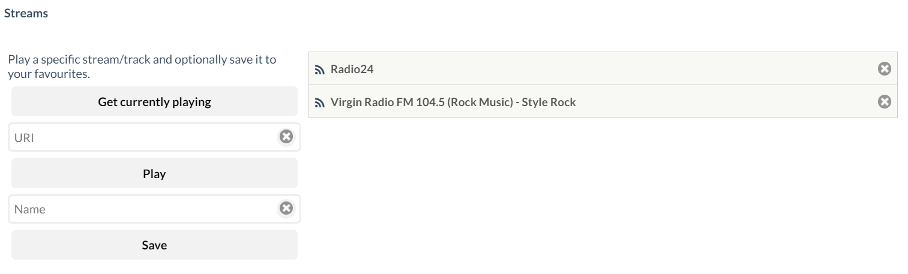
First off, I understood that PiMusicBox sees your radio stations list as a standard playlist that shows up in the ‘Playlist’ page of the web interface as ‘MusicBox favorites’. To add a new stream you can go to the ‘Stream’ page, insert the stream URI and the stream name in the form and press the ‘Save’ button. This is the easiest way to get it done, but it is rather annoying if you already have a list of stations you want to add them all at once.
The second approach (warning, you’ll get your hands dirty!) is to add all the streams directly within the playlist file…and here’s the first obstacle: where is it? Just open an SSH session with the Raspberry and look at the content of the settings.ini file (is in the /rc directory), close to the bottom you’ll find what you’re looking for:
playlist_dir=/music/playlist
Within that directory there is a file called [Radio Streams].m3u which is the one where you can append all the URI of your radio station. The file format is described here, for each stream you need to add two rows:
- the first, beginning with the word #EXTINF , will contain the duration of the stream (in case of a web radio just insert ‘-1’) and the station name;
- the second line is just the stream URI.
Here’s an example:
#EXTINF:-1,Radio24
http://shoutcast.radio24.it:8000/listen.pls
The newly added stations should show within the web interface in the ‘Streams’ page, just cick on the name to listen.
Now you have a working radio that can be controlled remotely by any browser on any device (including your smartphone)! In Episode 2 we’re going to learn to talk to an MPD server …and will add some buttons to make it more ‘physical’!
Stay…….tuned!


Pingback: RadioBerry! (3) | The Monday Morning Tech Newsletter
Pingback: RadioBerry! (4) | The Monday Morning Tech Newsletter
Pingback: RadioBerry! (5) - The Monday Morning Tech NewsletterThe Monday Morning Tech Newsletter