
Some days ago, while wandering on the Net, I came across an interesting video about two guys starting a car’s engine through a smartphone. Besides the obvious hardware wizardry, I was very attracted by the cool looking app they used to connect to the system: this was the very first time I heard about Blynk, an OS project aimed at building IoT app in a very easy and intuitive way. Or so they say.
I couldn’t resist such a promising declaration, so I checked out the ‘Docs’ section on the Blynk website: apparently, assuming you already have one of the more than 400 supported boards, your first Blynk app could be up and running in a matter of minutes….is it that easy?
Short answer: it is that easy.
Longer answer: continue reading!
When it comes to similar things, I’m rather impatient: let’s see if the ‘matter of minutes’ thing is real or it’s just marketing.
Time: 00:00:00 -> My very minimal setup includes an Internet connected laptop, an Arduino Duemilanove board, an Android smartphone and basically nothing else. First things first: install the the Blynk app (yes, most of the magic happen in an app) on the smartphone. By default, the app connects to a public Blynk server on the cloud, so I managed to create an account (a valid email address is enough) and got an authorization token, a long alphanumerical string.
Time: 00:00:30 -> the Arduino board is connected to my laptop through a ‘standard’ USB port, I’m far from home and there’s no way to connect it to the Net directly (but, as you will see, this isn’t an issue);
Time: 00:01:40 -> Blink libraries for Arduino downloaded and installed;
Time: 00:02:30 -> Basic Blynk sketch (available from the sketches collection added with the Blynk library) uploaded on the board, should be enough to send commands and read values from the board pins without writing any code;
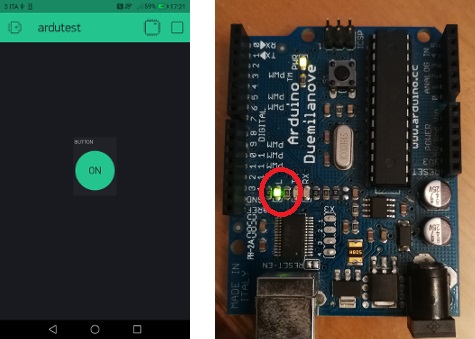
Time: 00:04:00 -> first project in the app is created: a button widget connected to the digital pin 13 on the board. It should turn on and off the built in led. All the widget configuration is done very easily within the app;
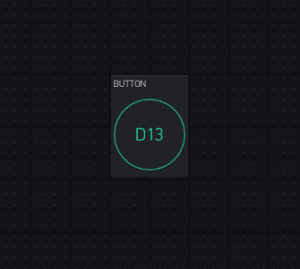
The widget can be added in the editor area selecting it from a list. It can be easily placed where needed and (partially) resized.
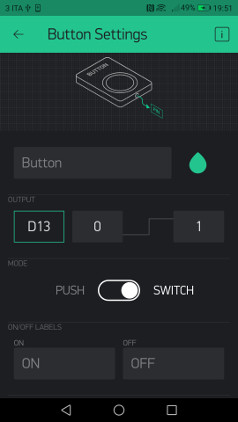
Configuration is really straightforward: choose board pin and output values and you’re done.
Time: 00:04:30 -> the script (provided within the Blink libraries for Arduino, for windows is a .bat file) to enable the communication between the board and the Blynk server is up and running;
Time: 00:04:40 -> It works! I’m able to set the LED state from my smartphone.
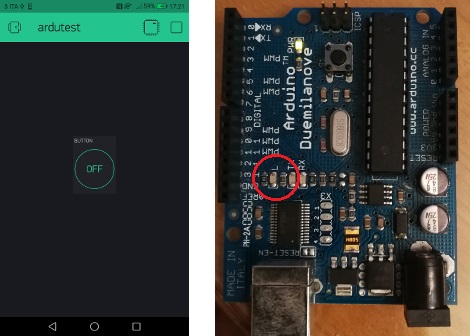
All of these are mostly point and click activities….so it’s really that easy! To be honest, I just had to edit one line of code within the Arduino script to insert the Blynk auth token string.
In the next chapters of this random exploration, more details of the Blynk architecture will be unveiled!

